miércoles, 10 de septiembre de 2014

Installing GNU Radio and USRP

Hello all,

Today I write about installing GNU Radio on Linux and USRP.

GNU Radio Installation.

I am using Ubuntu 14.04, and I installed GNU Radio from two different sources:
From Ubuntu Repositories:
$ sudo apt-get install libboost-all-dev libusb-1.0-0-dev python-cheetah doxygen python-docutils
$ sudo apt-get install gnuradio
Ok, ok, I accept it is too easy. The problems with this is that Ubuntu repositories are not always up-to-date, as I was told by Ettus Support. So, I better installed from Ettus repositories, following the instructions given in the next link: http://code.ettus.com/redmine/ettus/projects/uhd/wiki/GNURadio_Linux

From Ettus:
sudo apt-get install python python-wxgtk2.8 pyqt4-dev-tools python-qwt5-qt4 python-numpy libboost-all-dev libusb-1.0.0-dev
sudo bash -c 'echo "deb http://files.ettus.com/binaries/uhd_stable/repo/uhd/ubuntu/`lsb_release -cs` `lsb_release -cs` main" > /etc/apt/sources.list.d/ettus.list'
sudo bash -c 'echo "deb http://files.ettus.com/binaries/uhd_stable/repo/gnuradio/ubuntu/`lsb_release -cs` `lsb_release -cs` main" >> /etc/apt/sources.list.d/ettus.list'
sudo apt-get update
sudo apt-get install -t `lsb_release -cs` uhd gnuradio
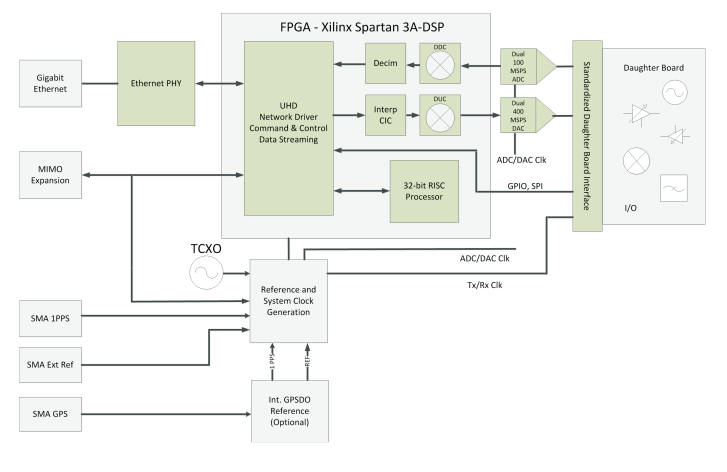
USRP

Once GNU Radio is installed, it is time to connect the USRP N210 to the computer using the Ethernet Cable. The default IP address of the USPR N210 is 192.168.10.2, so it is necessary to set an IP address for the host computer in the same network, in my case I set it to 192.168.10.1 with 255.255.255.0 as mask and 0.0.0.0. as Gateway. At first I made the mistake to put the IP address for the PC as 192.168.10.2 (the same as the USRP), of course I was able to pin from the command terminal but when trying to probe connection with it I always got the message:

Error: LookupError: KeyError: No devices found for ----->

Empty Device Address

With the USRP connected and the IP addresses correctly set, it is possible to test the device by typing:

$ uhd_usrp_probe
And you can expect to get this messages on the console (only the first lines are shown):

-- Opening a USRP2/N-Series device...
-- Current recv frame size: 1472 bytes
-- Current send frame size: 1472 bytes 


It happened to me that I a firmware upgrade was needed after the connection probe:


~$ uhd_usrp_probe

linux; GNU C++ version 4.8.2; Boost_105400; UHD_003.007.002-release


-- Opening a USRP2/N-Series device...

Error: RuntimeError:

Please update the firmware and FPGA images for your device.

See the application notes for USRP2/N-Series for instructions.

Expected FPGA compatibility number 10, but got 9:

The FPGA build is not compatible with the host code build.

Please run:
sudo "/usr/lib/uhd/utils/uhd_images_downloader.py"

"/usr/lib/uhd/utils/usrp_n2xx_simple_net_burner" \
--addr="192.168.10.2"

So I ran the uhd_images_downlader.py. It happened that the GNU Radio version from the Ubuntu repositories was not able to perform the firmware upgrade, but with the version from Ettus worked just fine, it takes a couple of minutes and it ends with:

Image burning successful. Reset USRP (Y/n)? y
 Once it has rebooted and up again, it is possible to use again:

$ uhd_usrp_probe
linux; GNU C++ version 4.8.2; Boost_105400; UHD_003.007.002-release

-- Opening a USRP2/N-Series device...
-- Current recv frame size: 1472 bytes
-- Current send frame size: 1472 bytes
...
...
...  

  
If you have further questions, let me know.

Thanks for reading.

martes, 9 de septiembre de 2014

Assembling USRP N210 hardware

In this entry I will show how to set up the USRP N210 hardware kit.

As advertised by Ettus, the USRP N210 kit contains:


  • A USRP N210.
  • 2 SMA-Bulkhead cables.
  • Ethernet cable.
  • Power Supply.
In our case we have 2 USRP N210 kits and also, we count with 2 SBX daugtherboards, which are designed to work on the frequency bands from 400 MHz up to 4.4 GHz


Here are a few photos taken while assembling the USRP N210:

Front view of the opened USRP.


Upper view of the USRP N210 with its SBX attached.

Front view of the already-assembled USRP N210.

If you need more info about assembling the USRP just check out this video, it is for USRP B210 but it is pretty much the same process for the USRP N210.


In a further entry I will write about setting up the USPR on GNU Radio.

Thanks.


martes, 2 de septiembre de 2014

USRP from Ettus

Hello,

I this entry I will write about USRP (Universal Serial Radio Peripheral) from the company Ettus Research. The intention of talking about USRP is due it is the hardware I am working with at this moment, it is not a commercial entry. USRP is only one of many recommended hardware peripherals by GNU Radio. Specifically I will write about USRP N210 kit. The basic idea of this kind of hardware it to be the front-end of our baseband signal processing waveforms in order to be transmitted over the air.

There are basically three series of USRP hardware:
  1. Networked Series.
  2. Serial Series.
  3. Embedded Series.
The Networked Series connects the peripheral with its host computer using an Gigabit Ethernet interface. On its side, the Serial Series uses USB 2.0 and USB 3.0 as interface between host computer and the radio hardware. The Embedded Series is not intended to be used with a host computer but for stand-alone operation applications.

Next few months I will be working with a couple of USRP N210 kits, this hardware has a Spartan 3A-DSP 3400 FPGA as its main feature. It also has dual 14-bit ADC (analog-to-digital converter) with a capacity of 100 MS/s (mega-samples per second) and 400 MS/s 16-bit DAC (digital-to-analog converter). The next figure shows the basic architecture of the USRP N210.

USRP N210 Architecture. Source.

It is very interesting to compare the architecture of this hardware (and any other hardware of its kind) to a basic SDR reference architecture as the one shown in the next figure.

Ideal SDR architecture. Kenington, P. B. (2005). RF and baseband techniques for software defined
radio (p. 177). Norwood: Artech House.

In a future entry, I will write about how to connect and use USRP with GNU Radio for a complete radio solution.


miércoles, 27 de agosto de 2014

GNU Radio

In this entry I will write about GNU Radio, a free and open source software development tool that provides signal processing blocks to implement software radios.
A few year ago, as electrical engineer student, I used to love Matlab and its Simulink tool. Due its price and the fact that I do not have the habit to use cracked software it was long time ago last time I used Matlab/Simulink.
In my quest of finding how to develop wireless systems, I crashed with GNU Radio and instantly fell in love. It is not only a great tool to simulate or create signal processing systems, but also it offers a easy way to implement those systems in real hardware... as I said, I just could not resist to fall in love.
GNU Radio is based on C++ and Python programming languages, every system consist basically in two parts: 'block' and 'flow graph'. A 'block', as called in GNU Radio, is a signal processing block written in C++, this language was chosen because its high computational efficiency. GNU Radio comes with dozens of built blocks as mathematical operators, filters, frequency modulation and demodulation, FFT, signal sinks. And of course the user can build and add his/her own blocks. A 'flow graph' is the data structure that connects different blocks in order to perform the desired communication system, Python programming languages is used to this data structure due its flexibility and easy way of programming. In order to create a common interface to communicate both programming language the tool called SWIG (Simplified Wrapper and Interface Generator) is used. The figure below shows in a simplified manner how is the basic idea behind the creation of complete communication systems using GNU Radio.

Structure of GNU Radio.

To make life easier, GNU Radio comes with a graphical tool called GRC that stands for 'GNU Radio Companion', this useful and powerful tool will save you a lot of time while building your systems and if you are familiarized with Simulink, you will not waste time learning how this tool works, it is as easy as search, drag and click a couple of blocks and you will have an operational communication system.

A communication system as seen in GRC.

A few days ago in a fresh Ubuntu 14.04 installation on an old computer, installing GNU Radio was as easy as:

sudo apt-get install gnuradio
 I remember that a couple of years ago it was not that easy. So, what are you waiting for installing and start building your own communication systems?.

Welcome to Azulita Wireless, building optimized wireless solutions.

Hello everyone,

Welcome to Azulita Wireless; my name is Harold Daniel Moreno Urbina, a costarrican electrical engineer and a wireless communication passionate. This blog will be my diary relating my work on wireless communication, embedded systems, FPGA, GNU Radio, USRP, theoretical digital (wireless) communications.
In Spanish "Azulita" literally means "she little blue" and it is one of my beloved Great Dane's nicknames, that is what inspired the name of this blog.

She is Atenea, my blue great Dane, isn't she absolutely cute?

I hope you will find this blog very useful as much as I find this topic so exciting. So...let's build great wireless communication systems!.